Easily Accept Payments with Django and Stripe
Taking payments is simple, once you know where to look.
I recently wrote about the difficulty of building web products like CodeStories. Today, I want to be more constructive and contribute what I learned during the process of allowing CodeStories to accept customer payments. Hopefully, this tutorial will seem pretty straightforward. The difficulty with Stripe was that their documentation was surprisingly scattered. So we’ll walk through what did work and where to find more information.
Caveats
This won’t cover all aspects of how Stripe and Django could interact with each other. This tutorial makes a few important assumptions:
- You want to sell a Product, not a Subscription. Stripe has a clear separation between the two concepts, and I’m currently selling a product.
- You don’t need dynamic pricing or anything that requires server-side decisions. We’re going to be using Stripe Checkout, which comes with some limitations because it’s purely client-side logic.
- You already have an existing Django app. This is just covering the case where you’ve already built a site and now you want to monetize it.
1) Create a Product
- If you don’t already have a Stripe account, create one. This step will require you to fill out some information about your business, but it’s all fairly standard. You won’t need any official forms or ID values.
- Then create a new Product. Fill out the details describing what it is you’re selling.
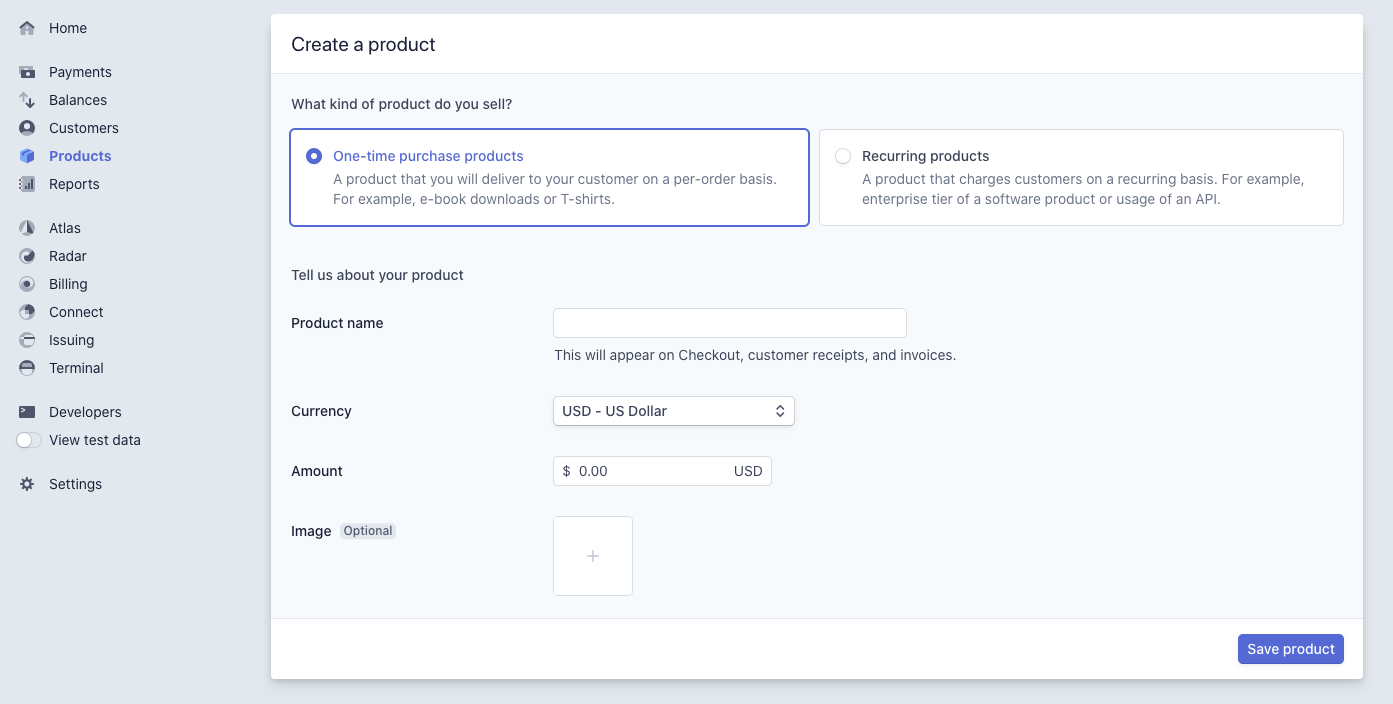
When you’re finished making the product, you should have an associated “SKU” value like sku_RandomLetters. Keep track of that; we’ll need it for step 3.
2) Enable Stripe Checkout
I’m sure there’s a good reason users have to do this. But I don’t know what it is. In order to use Stripe’s “Checkout” system, you have to enable it in your account. While certain pieces of documentation fail to mention this fact, step 1 of this page clearly states what to do. Follow the directions and click the button in your Dashboard labeled “Disabled”.
3) Set up the Django backend
Let’s switch gears for a little bit and set up the backend. Even though virtually all of the actual payment logic with Checkout is client-side, you still need some URLs, a View, and a bit of html for users to interact with.
3.1) Add URLs
You’ll need 3 URLs. We’ll call them:
pay/pay_success/pay_cancel/
pay/ is the URL where site visitors go to purchase your Product. The other two are the locations to which Stripe will redirect, depending on the outcome of the payment attempt.
In urls.py:
from django.urls import path
from django.views.decorators.csrf import csrf_exempt

from my_project.views import PaymentCheckoutView


urlpatterns = [
    # ...
    path("pay/", csrf_exempt(PaymentCheckoutView.as_view()), name="pay"),
    path(
        "pay_success/",
        TemplateView.as_view(template_name="pages/pay_success.html"),
        name="pay_success",
    ),
    path(
        "pay_cancel/",
        TemplateView.as_view(template_name="pages/pay_cancel.html"),
        name="pay_cancel",
    ),

]
This code snippet is particularly important because of the usage of csrf_exempt on the pay/ URL. Virtually all of Stripe’s tutorials use csrf_exempt as a decorator on the View functions/methods, but I needed to put it on the URL. Speaking of Views, however…
3.2) Add PaymentCheckoutView
We only need to write one View. As shown above, TemplateView will suffice for the other two URLs. For now, we’ll only add the get method for handling GET requests. We’ll add post later.
In views.py:
from django.shortcuts import render
from django.views.generic import TemplateView
from django.contrib.auth.mixins import LoginRequiredMixin


SKU = "sku_RandomLetters"

class PaymentCheckoutView(LoginRequiredMixin, TemplateView):

    def get(self, request):
        context = {
            "stripe_public": settings.STRIPE_PUBLIC,
            "SKU": SKU,
        }
        return render(request, "pages/pay.html", context)
There are a bunch of things to note here:
- The value for
SKUcomes from step 1. It isn’t strictly required that you define it here, but I found it easier than messing with the html/js, since it’s used multiple times there. - We are requiring that users login before accessing this page (via
LoginRequiredMixin), which makes sense given that we’re now asking them to pay. - We are storing our public key as an environment variable. You can get your keys here.
- The html page being rendered is
pages/pay.html, which hasn’t been defined yet.
3.3) Add pages/pay.html
The rest of the page can be as simple or complex as you want. The only necessary snippet is…
In pay.html:
<!-- Load Stripe.js on your website. -->
<script src="https://js.stripe.com/v3"></script>

<!-- Create a button that your customers click to complete their purchase. Customize the styling to suit your branding. -->

<div id="error-message"></div>

</div>
<button
  class="some-class-name"
  id="checkout-button-"
  role="link"
>
  Pay
</button>

<script>
(function() {
  var stripe = Stripe('');

  var checkoutButton = document.getElementById('checkout-button-');
  checkoutButton.addEventListener('click', function () {
    // When the customer clicks on the button, redirect
    // them to Checkout.
    stripe.redirectToCheckout({
      items: [{sku: '', quantity: 1}],
      clientReferenceId: '',
      // Do not rely on the redirect to the successUrl for fulfilling
      // purchases, customers may not always reach the success_url after
      // a successful payment.
      // Instead use one of the strategies described in
      // https://stripe.com/docs/payments/checkout/fulfillment
      successUrl: 'https://my_project.com/pay_success',
      cancelUrl: 'https://my_project.com/pay_cancel',
    })
    .then(function (result) {
      if (result.error) {
        // If `redirectToCheckout` fails due to a browser or network
        // error, display the localized error message to your customer.
        var displayError = document.getElementById('error-message');
        displayError.textContent = result.error.message;
      }
    });
  });
})();
</script>
Step 3 of the Checkout documentation shows you how to autogenerate this code. In the current version of Stripe’s UI, the button you’re looking for is “Use with Checkout”. Clicking this will prompt you to fill in the appropriate results URLs (pay_success/ and pay_cancel/) then give you a code snippet.
We’ve made a number of important changes to the autogenerated code:
- All instances of the hard-coded SKU have been replaced with
{{SKU}}. - Similarly, the hard-coded public key is replaced with
{{stripe_public}}. - Most importantly, we’ve added the line
clientReferenceId: '{{ request.user.username }}', whererequest.user.usernameis a unique identifier for each user. This allows us to keep track of which user paid.
4) Fulfillment
At this point, we’ve actually handled all of the logic we need to get paid! If we’ve done everything correctly, users should be able to:
- Navigate to
my_project.com/pay. - Click on a button that says
Pay. - Get directed to Stripe’s site and pay.
- Get redirected back to
my_project.com/pay_success.
Stripe’s Checkout page should look something like this:
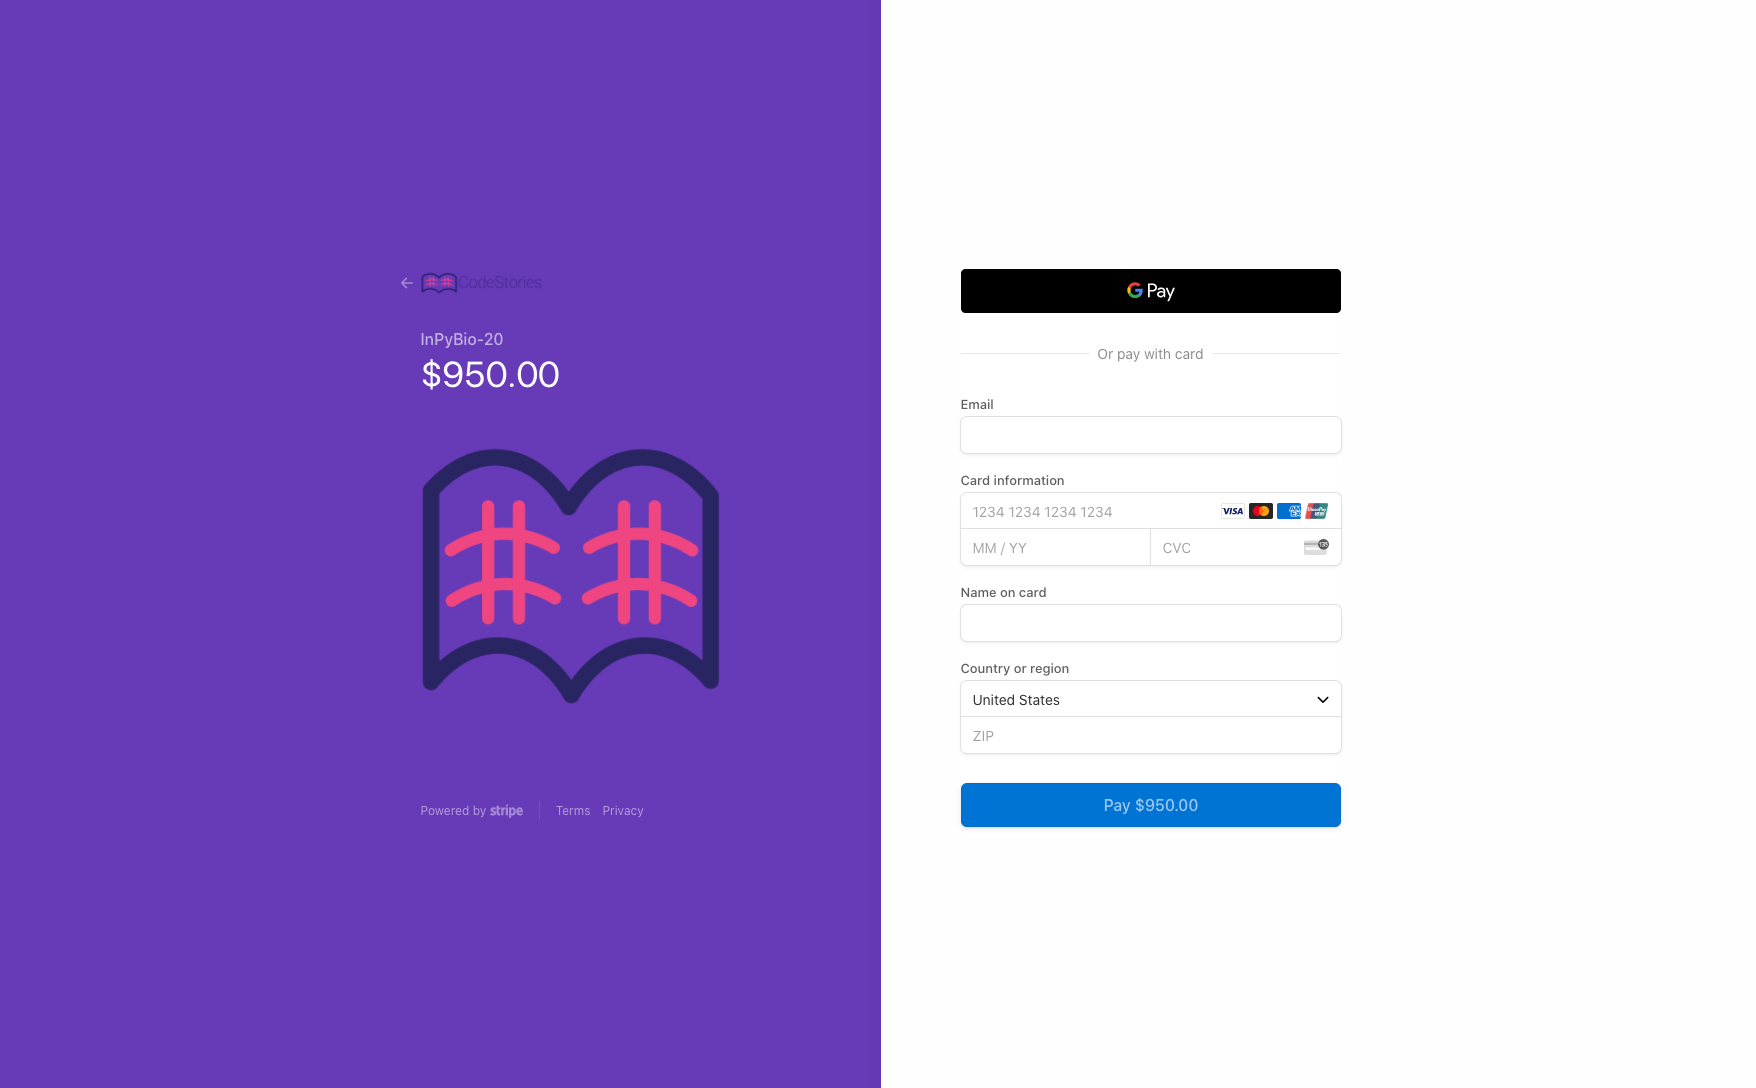
But getting paid is only half of the deal. Now, we need to alert our Django app that a customer has paid. Stripe is very explicit that you should not use a customer landing on my_project.com/pay_success as a method of detecting payment. See here for more info. Stripe lists a variety of ways to fulfill a purchase. We implemented a webhook.
4.1) Webhooks
Stripe’s documentation for webhooks is alright, if currently a little inconsistent (depending on the page). Mostly, you can follow the documentation here. One notable exception are the lines
event = stripe.Webhook.construct_event(
  payload, sig_header, endpoint_secret
)
which didn’t work for me. Instead, I needed to use
event = stripe.Event.construct_from(
    values=json.loads(request.body), key=settings.STRIPE_SECRET
)
as documented here.
Regardless, once you’ve set up the webhook at the dashboard, you can add the following update to PaymentCheckoutView.
In views.py:
def fulfill(self, username):
    ...

def post(self, request):
    """
    https://stripe.com/docs/webhooks/build
    """
    try:
        event = stripe.Event.construct_from(
            values=json.loads(request.body), key=settings.STRIPE_SECRET
        )
    except ValueError as e:
        return HttpResponse(e, status=400)
    e_type = event["type"]
    if e_type == "checkout.session.completed":
        username = event["data"]["object"]["client_reference_id"]
        self.fulfill(username)
        msg = f"SUCCESS: {username} has paid!"
        return JsonResponse({"result": msg})
    return HttpResponse(
        f"e_type={e_type} isn't valid. Also check Stripe for more info.", status=400
    )
The main thing to note here is that the logic of fulfill has been left blank because it’s completely business-specific logic.
Results
And we are done! Customers can now pay for your good or service, and you can fulfill their purchase.